
AI Rendering
Generate interior renderings from your products and prompts.
AI Rendering (sidebar → AI Rendering) generates interior visuals: place your specified products into styled scenes for concept boards, client presentations, and design studies.
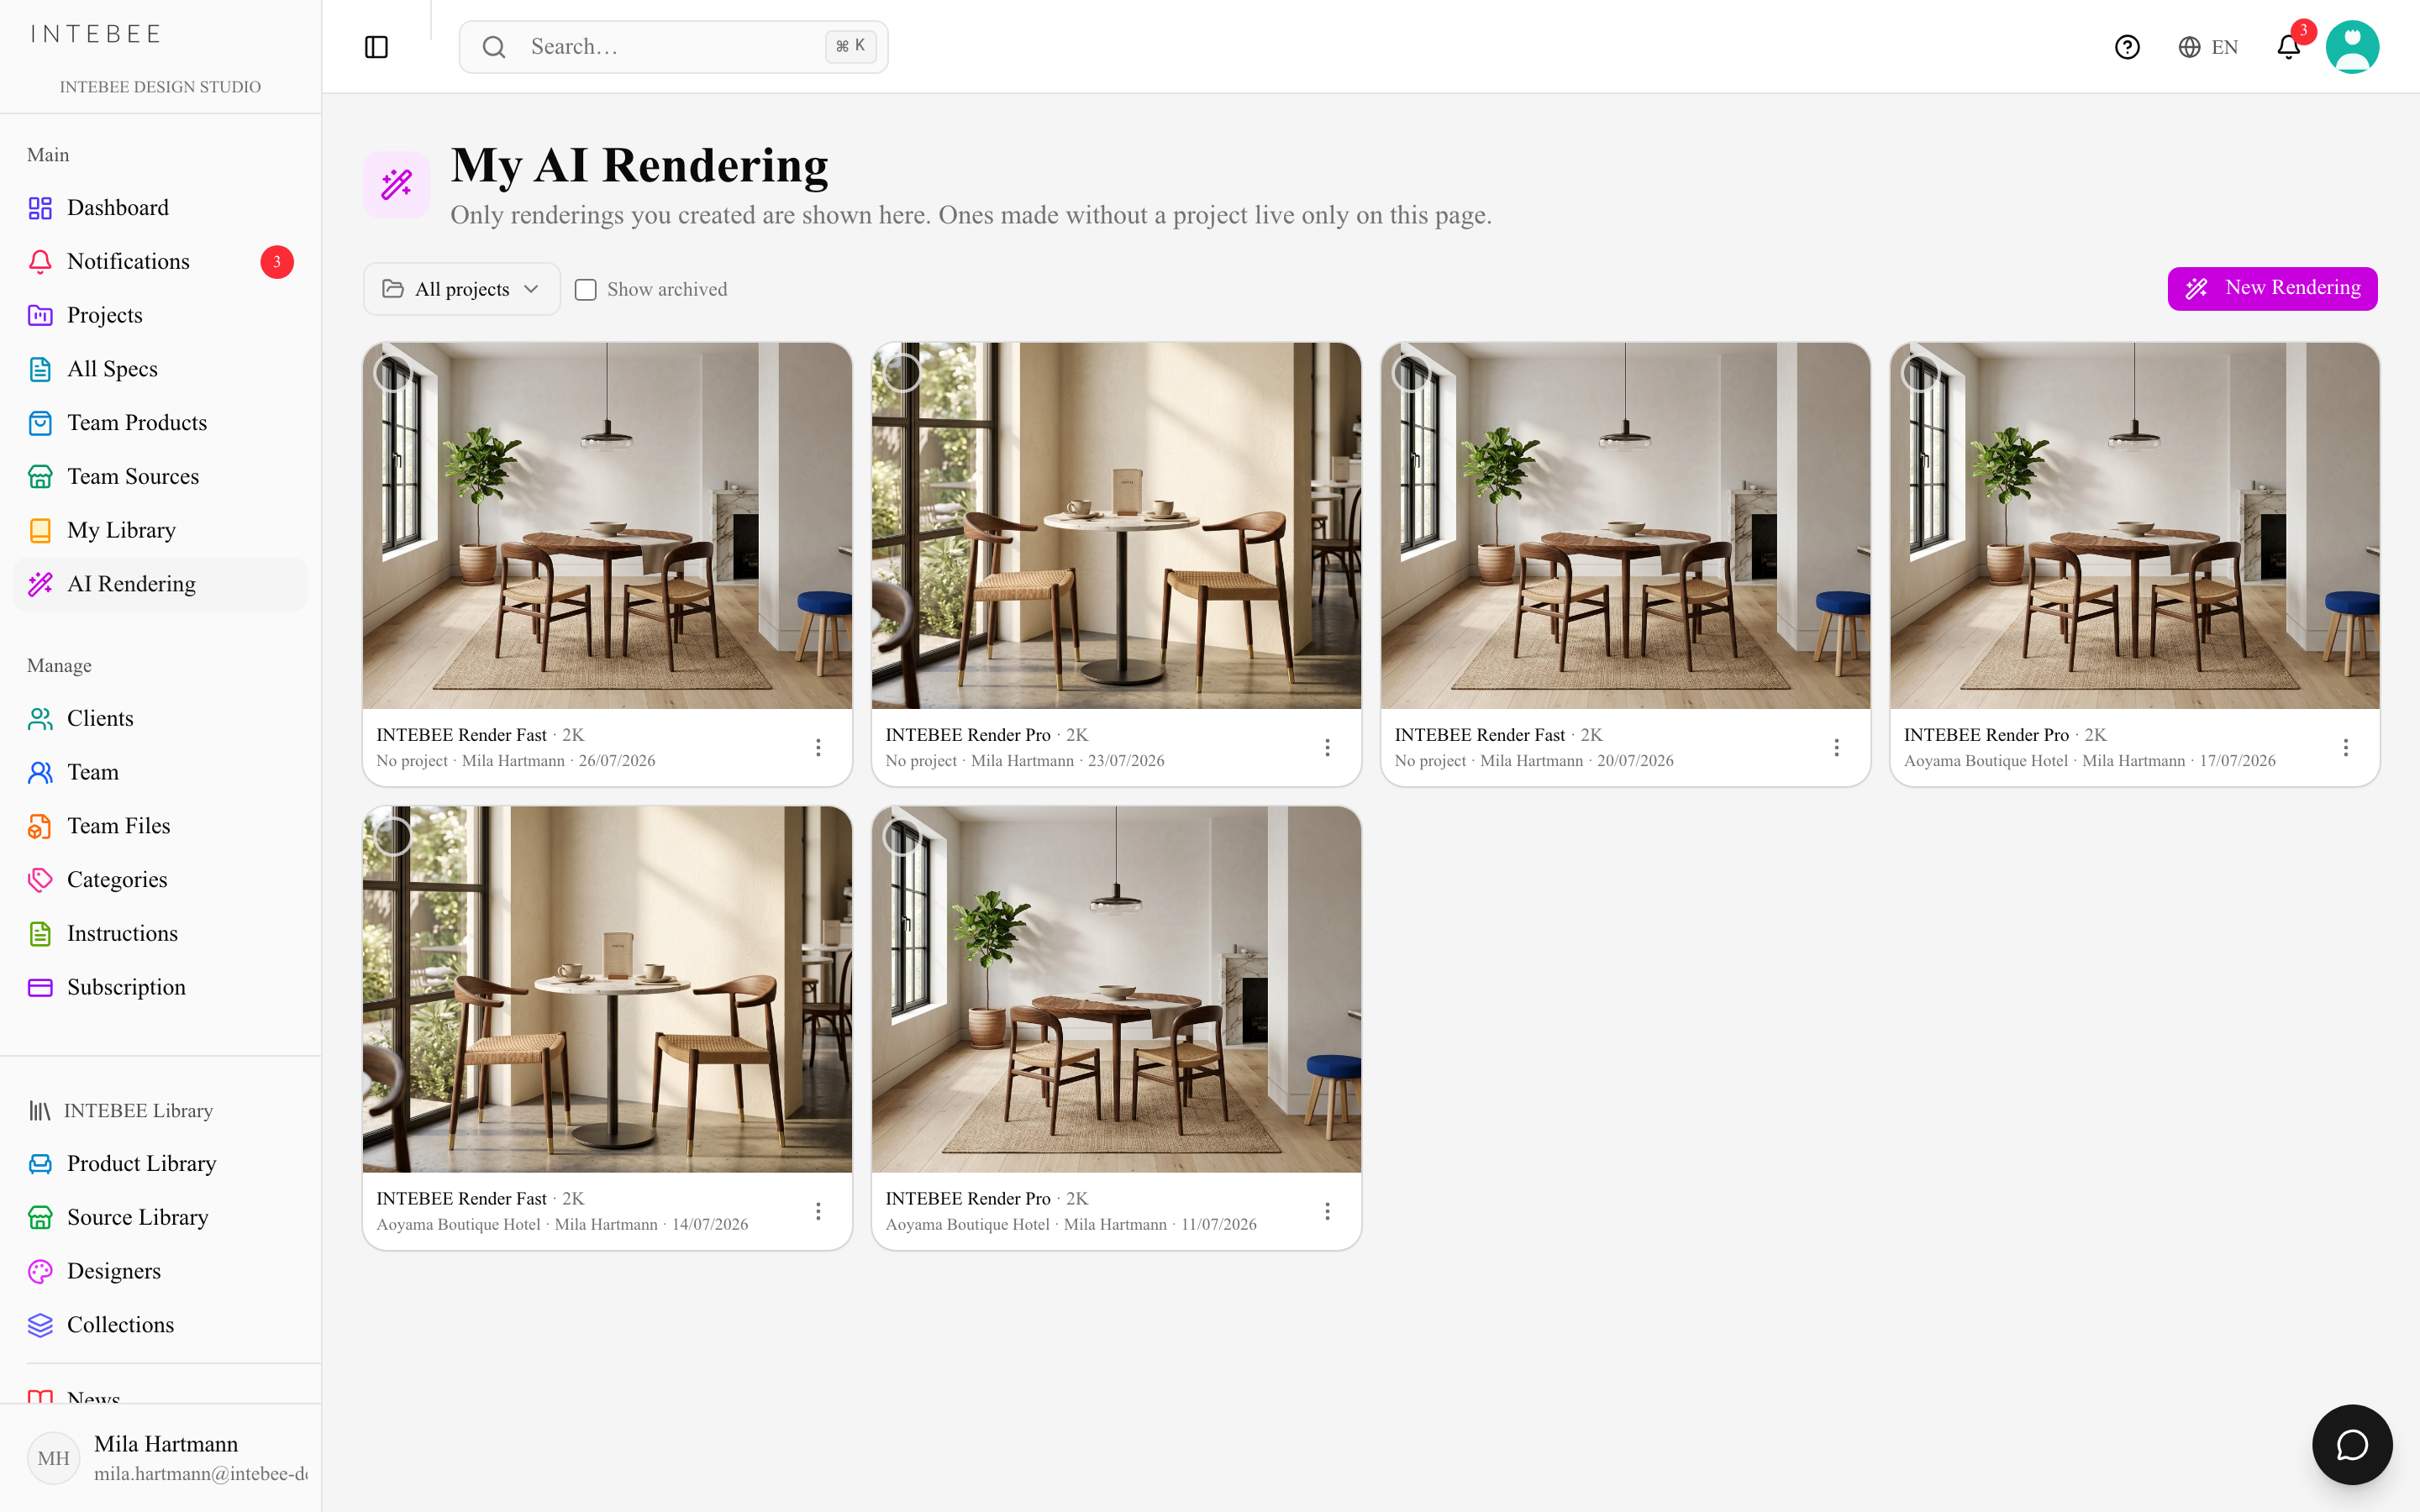
Generating a rendering
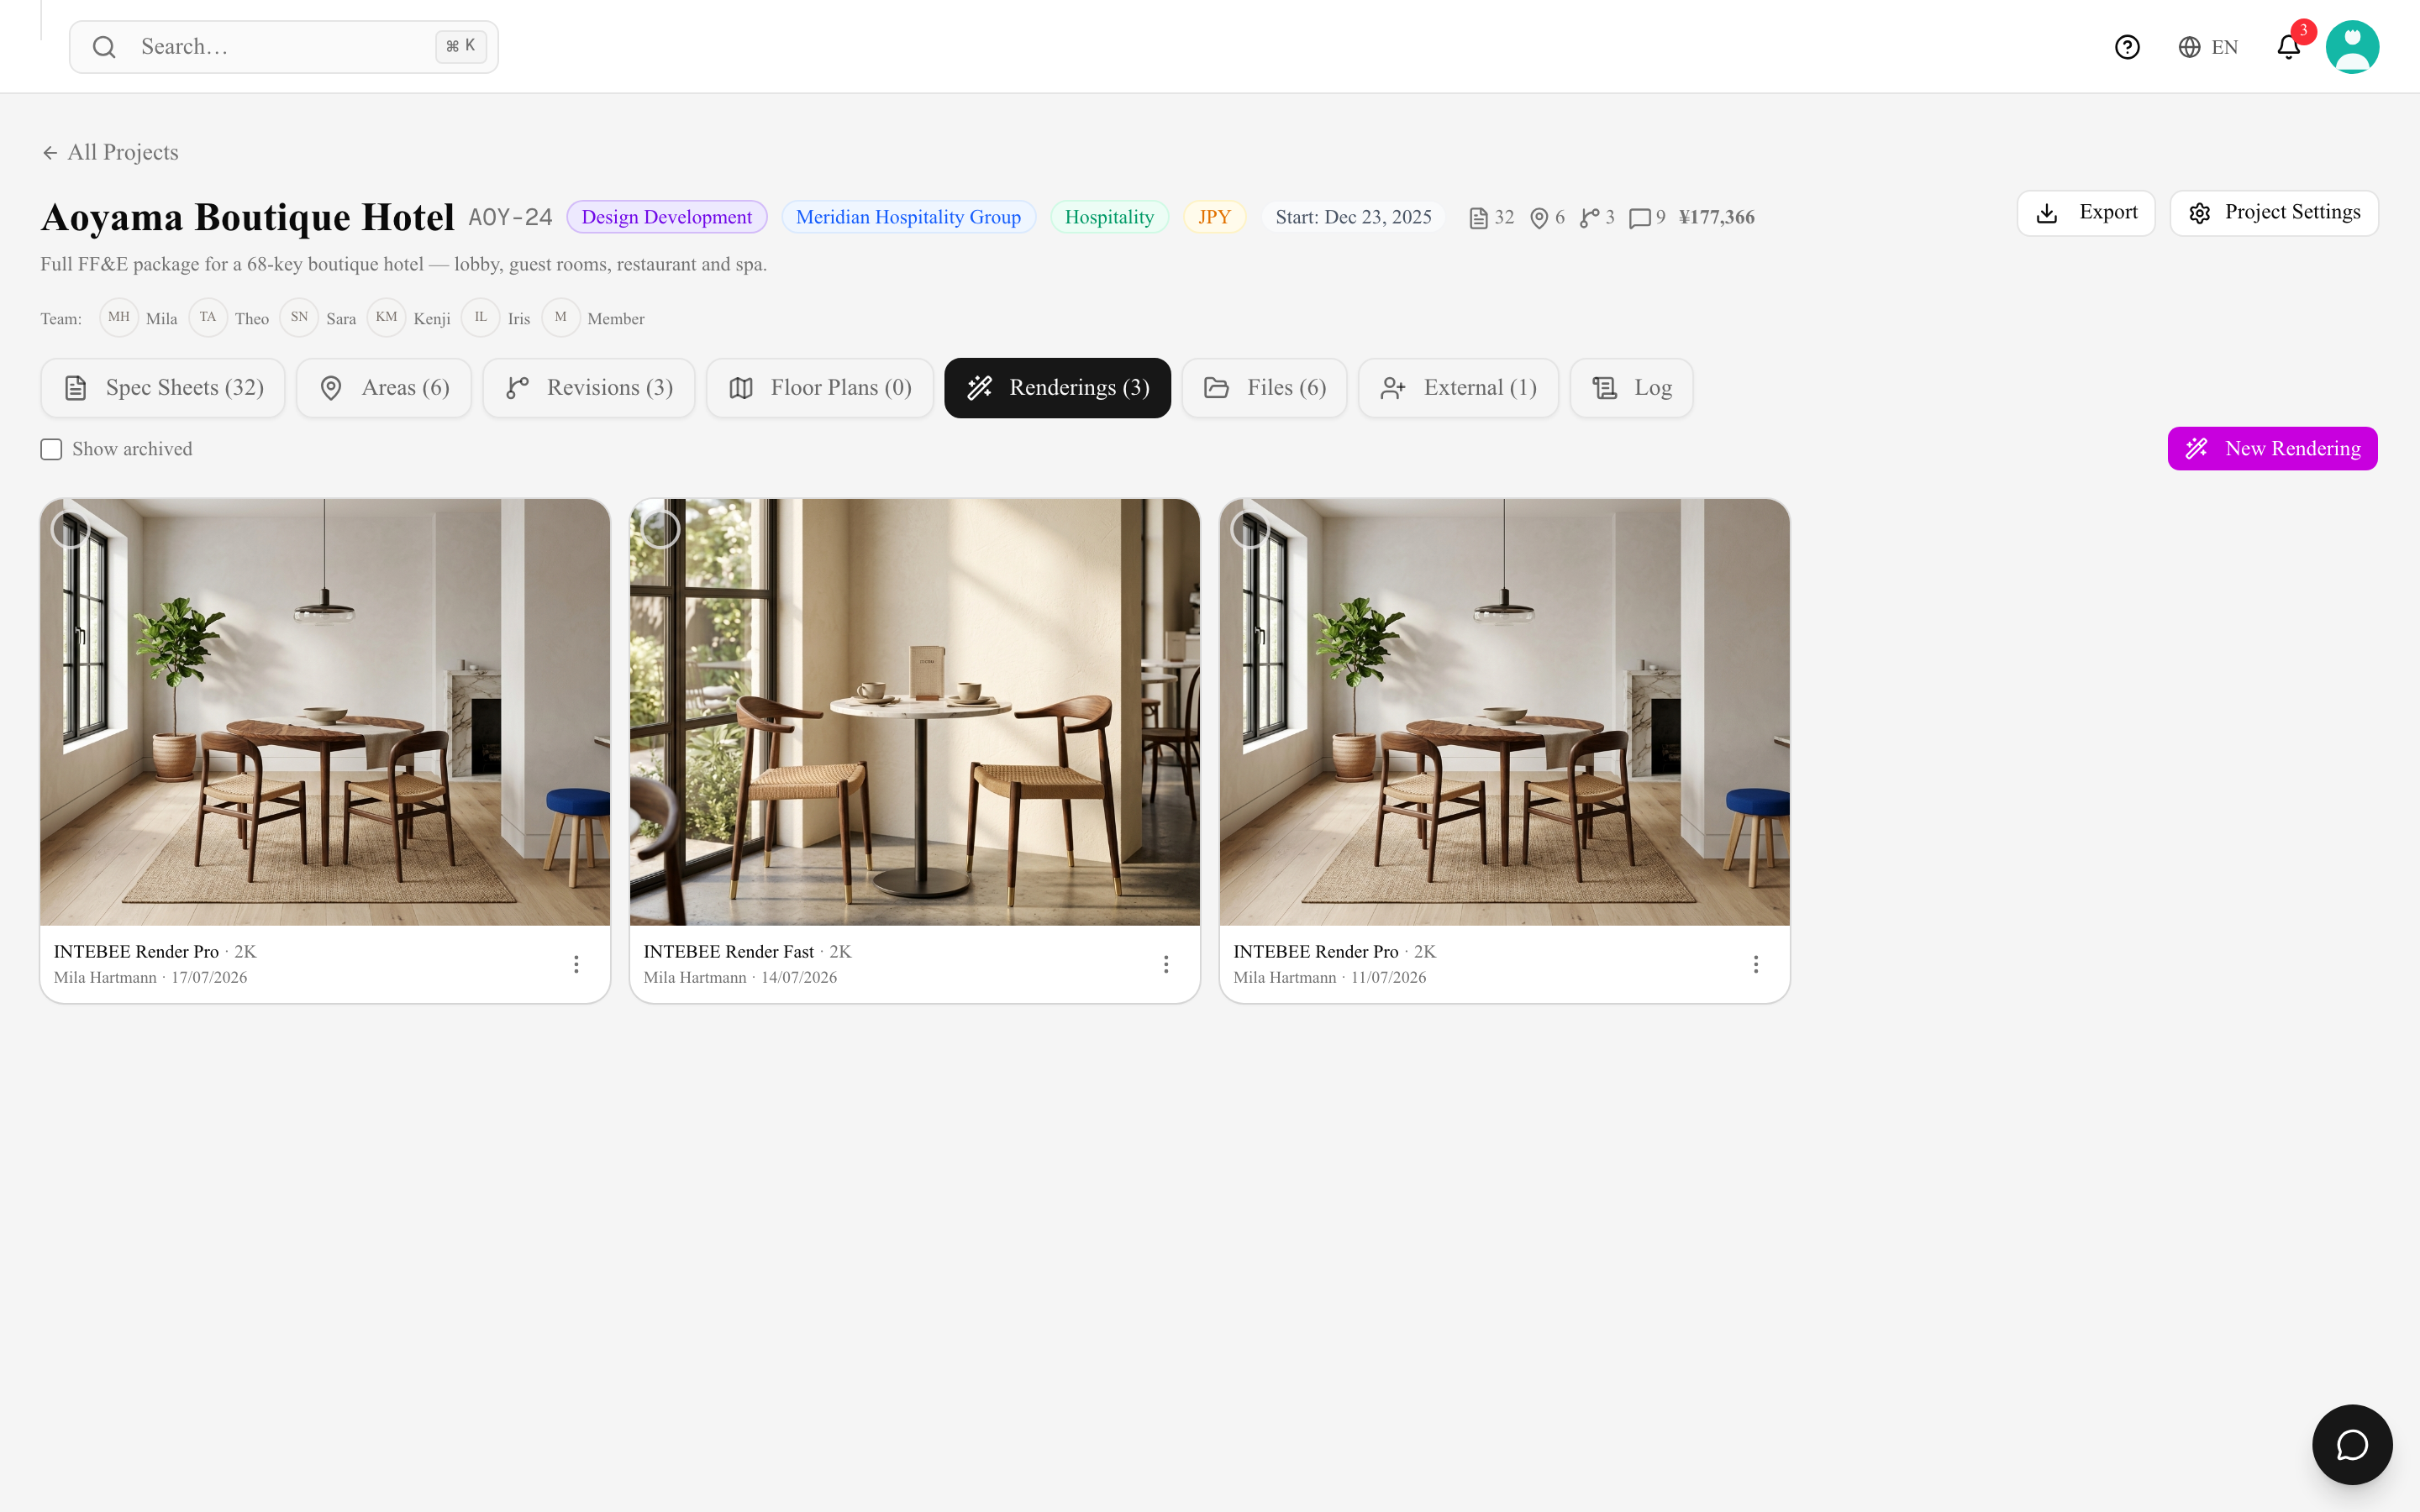
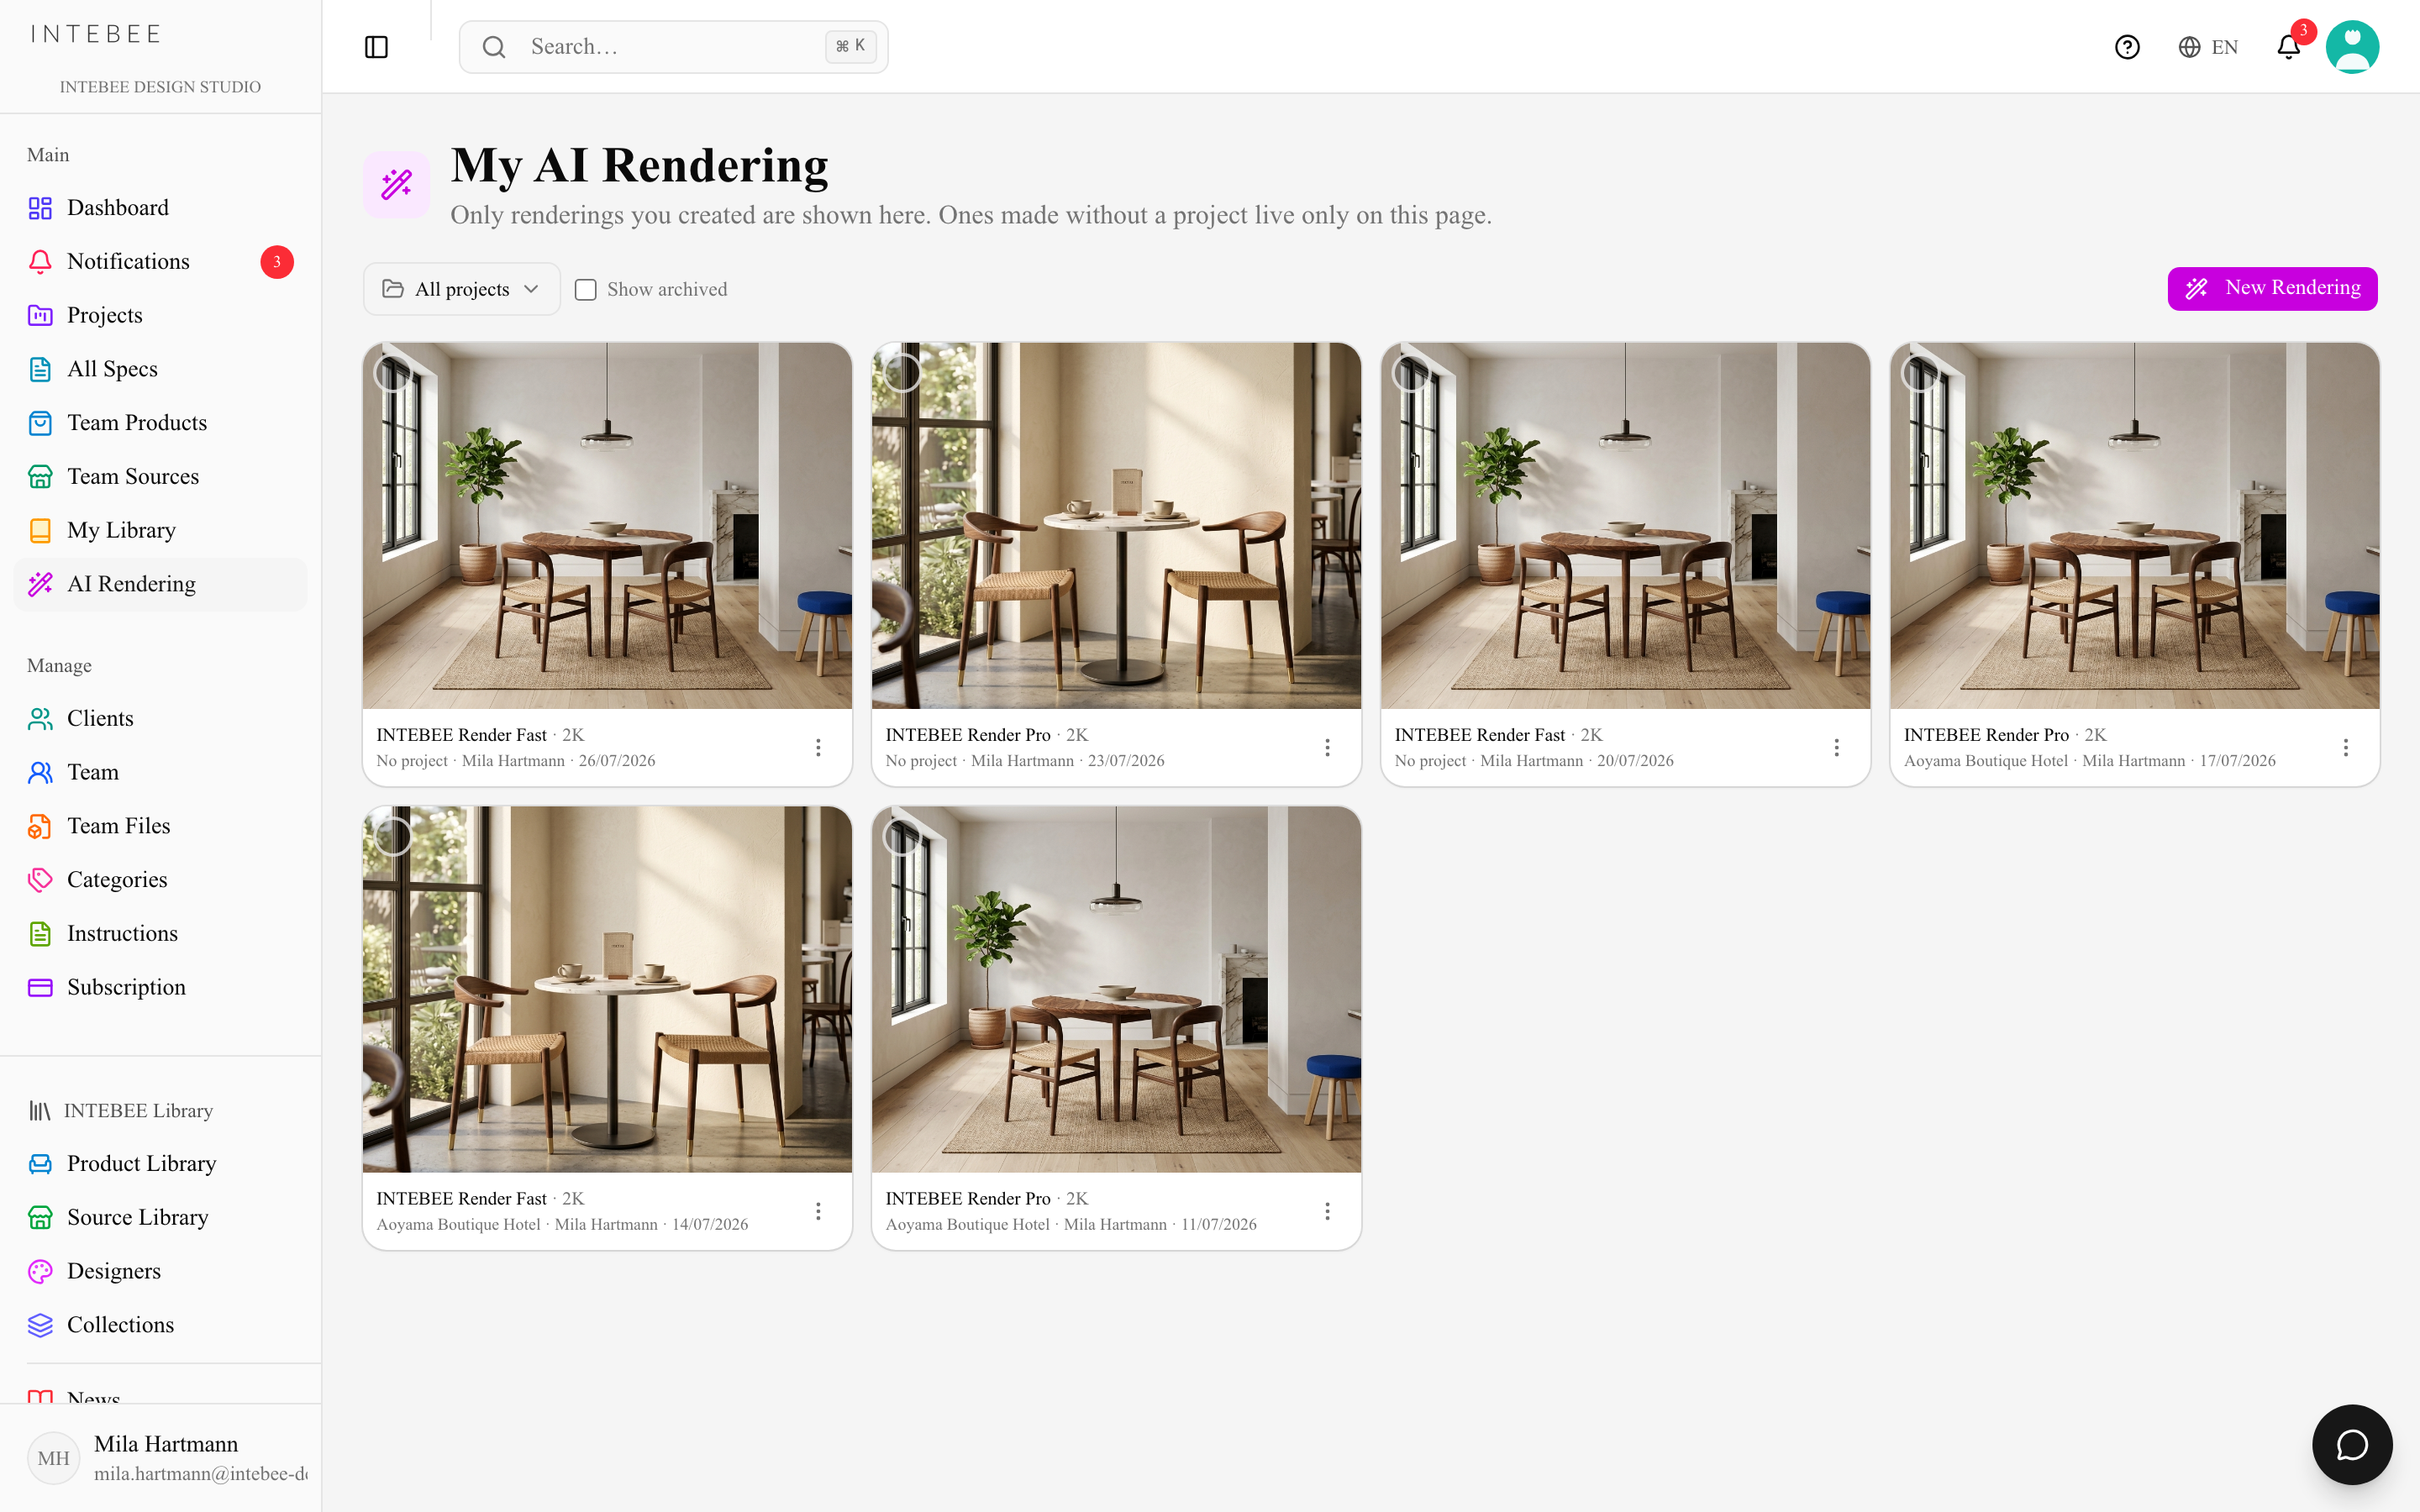
Click New Rendering. You are asked which project it belongs to first — pick one, or Not for a Specific Project for a rendering that stays on your own AI Rendering page. A project rendering also appears on that project's Renderings tab.
The generator then opens as one form of six cards. Only Model and something to render are strictly required; everything else has a sensible default.
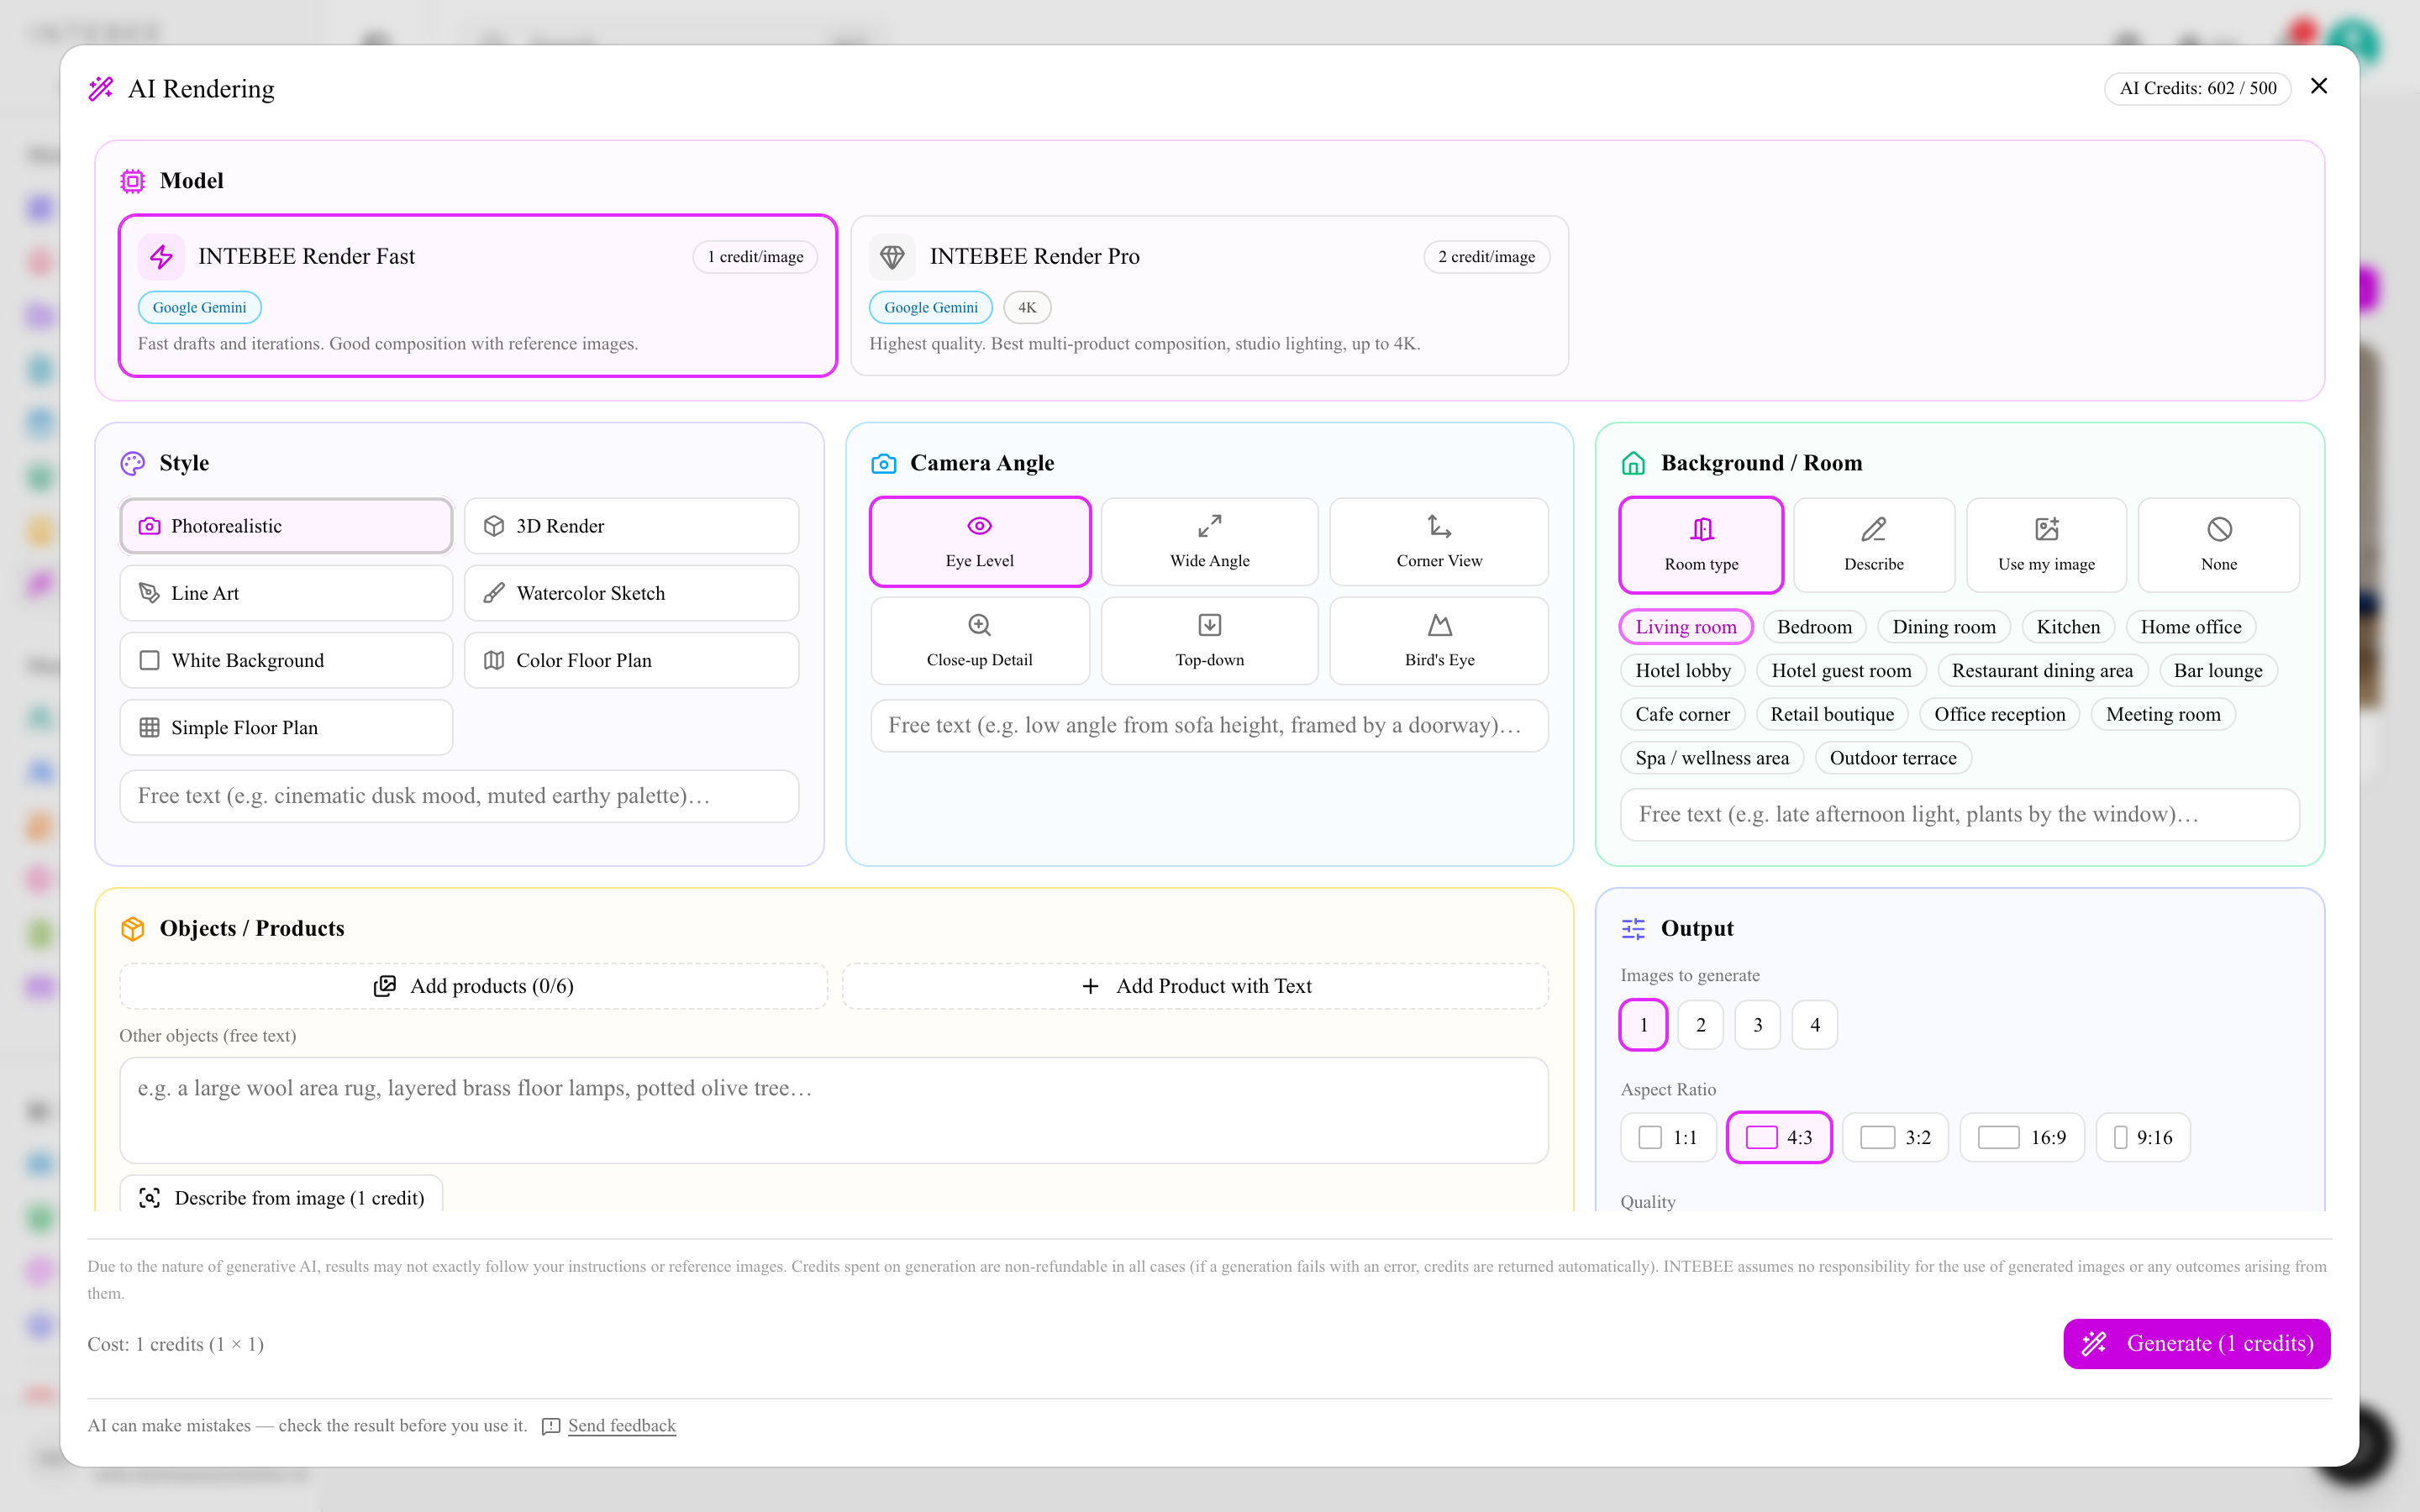
- Model — the engine. Each card shows its own credit cost per image; your remaining AI credits sit in the dialog header.
- Style — Photorealistic, 3D Render, Line Art, Watercolor Sketch, White Background (the product alone on a seamless white studio backdrop), Color Floor Plan or Simple Floor Plan. A free-text box takes the nuance a preset can't carry ("cinematic dusk mood, muted earthy palette"). The two floor-plan styles drop the background and camera cards, because a top-down plan has neither; White Background drops the background card.
- Camera Angle — Eye Level, Wide Angle, Corner View, Close-up Detail, Top-down or Bird's Eye, plus its own free-text box.
- Background / Room — four ways to say where the scene is:
- Room type — pick from the presets (Living room, Hotel lobby, Restaurant dining area, Retail boutique, Spa / wellness area, Outdoor terrace…).
- Describe — write the room yourself.
- Use my image — upload a photo of the real room, then say how closely to follow it: Keep exactly, Keep layout, Inspiration only, or Floor plan reference for a 2D drawing rather than a photo. A second box takes the changes to apply ("repaint walls sage green, remove the curtains").
- None — no room at all.
- Objects / Products — Add products pulls in up to 6 spec sheets from the project, each with its own adjustment note ("in walnut finish, place near the window"). Add Product with Text describes an object you have not specified yet. Below them, Other objects (free text) covers the props that aren't spec sheets — the rug, the floor lamps, the olive tree.
- Output — how many Images to generate (1–4), the Aspect Ratio (1:1, 4:3, 3:2, 16:9, 9:16) and the Quality (1k, 2k, 4k, where 4K depends on the model). Each quality shows its credit cost. Additional Instructions closes the form.
The footer shows the total before you commit — Cost: 6 credits (2 × 3) — and the button repeats it: Generate (6 credits). Generation takes roughly 15–60 seconds per image, and you can close the dialog while it runs: the rendering keeps going and appears in the gallery when it's done.
Models and quality
| Model | Best for | Credits per image |
|---|---|---|
| INTEBEE Render Fast | Drafts and quick iterations | 1 (2 at 2K) |
| INTEBEE Render Pro | Final-quality visuals, multi-product composition, up to 4K | 2 (3 at 2K, 4 at 4K) |
Available models and their credit costs are shown in the generator — costs can change as underlying models evolve, and your administrator decides which engines are enabled.
Describe from image
Instead of writing the scene yourself, click Describe from image (1 credit) and upload a reference photo (up to 8MB). AI reads the image and writes the description into the prompt field, which you can then edit. It's available for the background and for the Other objects description.
Editing a rendering
A result that is nearly right does not need generating again. Open a rendering's menu and choose Edit image: the Edit Rendering dialog puts the original beside the result and takes one instruction — "make the sofa upholstery deep green velvet", "add warm evening lighting". Everything else in the image stays untouched. One edit costs the model's per-image rate, and the edited version is saved as a rendering of its own, linked back to the source.
From a floor plan
The floor plan editor's AI Render tool lets you drag a region of a plan and render it — the spec sheets whose leader lines land inside that region are attached to the render automatically, and the background defaults to Floor plan reference. See Floor plan drawing tools.
The gallery
The AI Rendering page holds everything you have generated, newest first.
- Project filter — All projects, one project, or Not for a Specific Project.
- Show archived — archived renderings are hidden by default; this brings them back.
- Select — tick several cards and the bar offers Download, Archive and Delete in one go.
- Each card's menu has View settings (the whole form that produced it, model and creator included), Download, Duplicate settings (reopen the generator with those choices, to try a variant), Edit image, Archive / Unarchive and Delete.
Credits
Each image consumes AI credits from your workspace's shared allowance (see AI credits explained). Credits come back only when a generation fails with an error — in a batch of four where one image fails, that one is refunded and the rest are not. A result you simply don't like has still been generated, so it still costs. Iterate on the cheap model, and spend the expensive one on the version you intend to show.
Tips
- Reference images work best when they show the product clearly on a plain background.
- Iterate with Fast, finalize with Pro — same settings, better quality, fewer wasted credits. Duplicate settings is what makes that cheap.
- Renderings are AI-generated concepts: verify materials, scale, and details against the actual specification before presenting them as final.
- When a result is wrong, use the Send feedback link under the generator — it reaches us tagged with the feature it came from. See Help, tours and feedback.